|
Boat Building Fish gotta swim, birds gotta fly. I guess I gotta build boats. Plus, I made the mistake of stopping by the local Building Material Bargain Barn just to look. Always a bad idea.
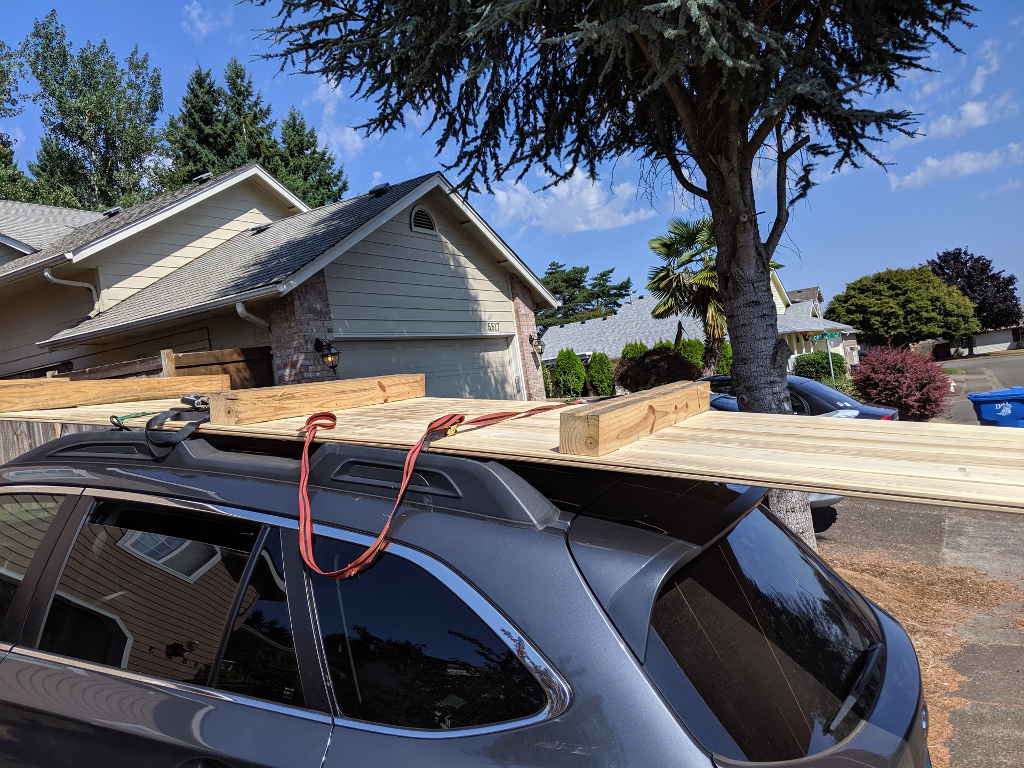
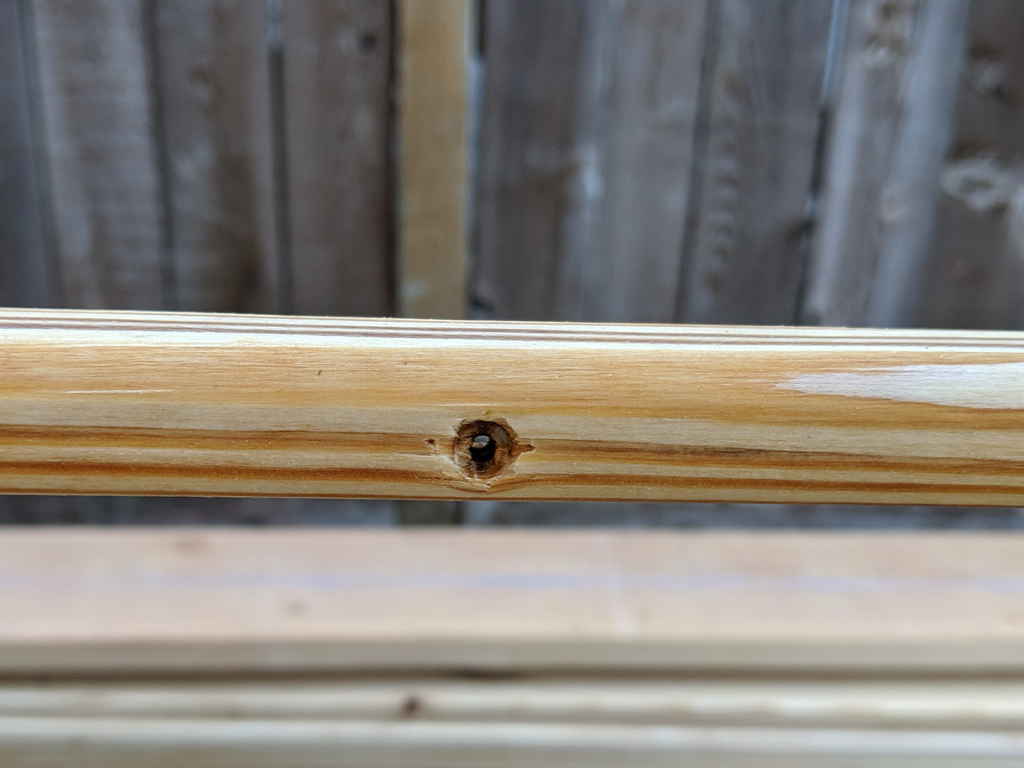
This boat started life as a 16' long pallet that had been used to ship 16' long decking material. Mostly clear (except for the nail holes) Southern Yellow Pine, 16' x 7/8" x 5 1/2". They were selling the deck material for $1 a foot and just throwing the pallets away. "Hey, mister? Mind if I throw a pallet away for you?" Seven sticks and five 4x4s were too heavy for me to take off the car, so I had to deconstruct the pallet in situ, so to speak. Bit of a trick, but doable.
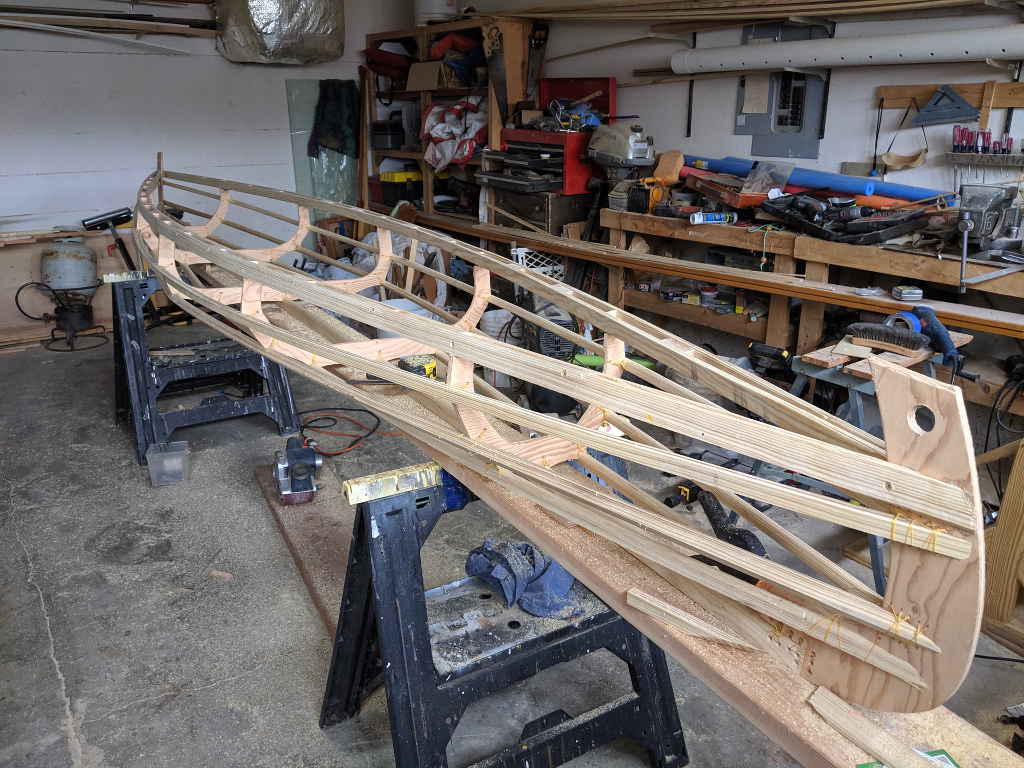
No pics of the build. Skin on Frame (SoF) is almost all prep work, anyhow. Transfer the frames, cut the frames, rip the sticks, sand, drill, blah, blah. I did at least two questionable things on this build, but I didn't take pictures of them and they take too long to explain.
There's no real reason to treat the stringers, but it's fun. 1/3rd each: Boiled Linseed Oil, Turpentine, and a drying agent like Mineral Spirits. Makes a lovely mix just a little thicker than water and the wood loves it. The first coat took almost all of the initial 3 cup batch. And it stinks like tradition. Everybody hated the smell but me.
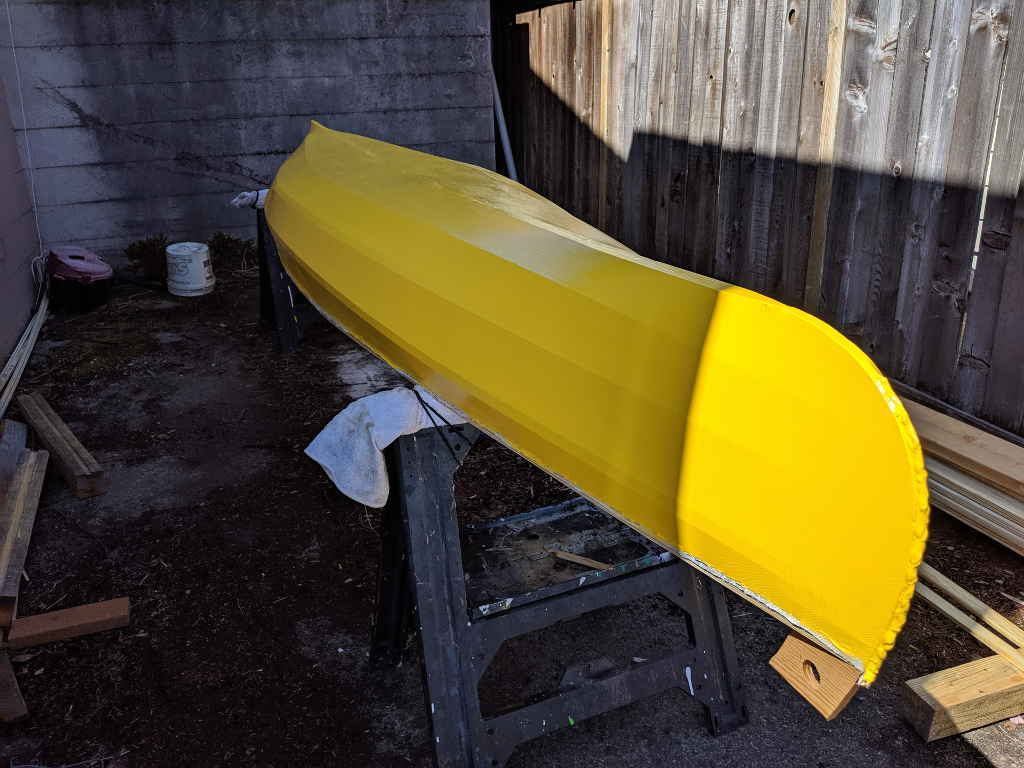
All painted up and purty.
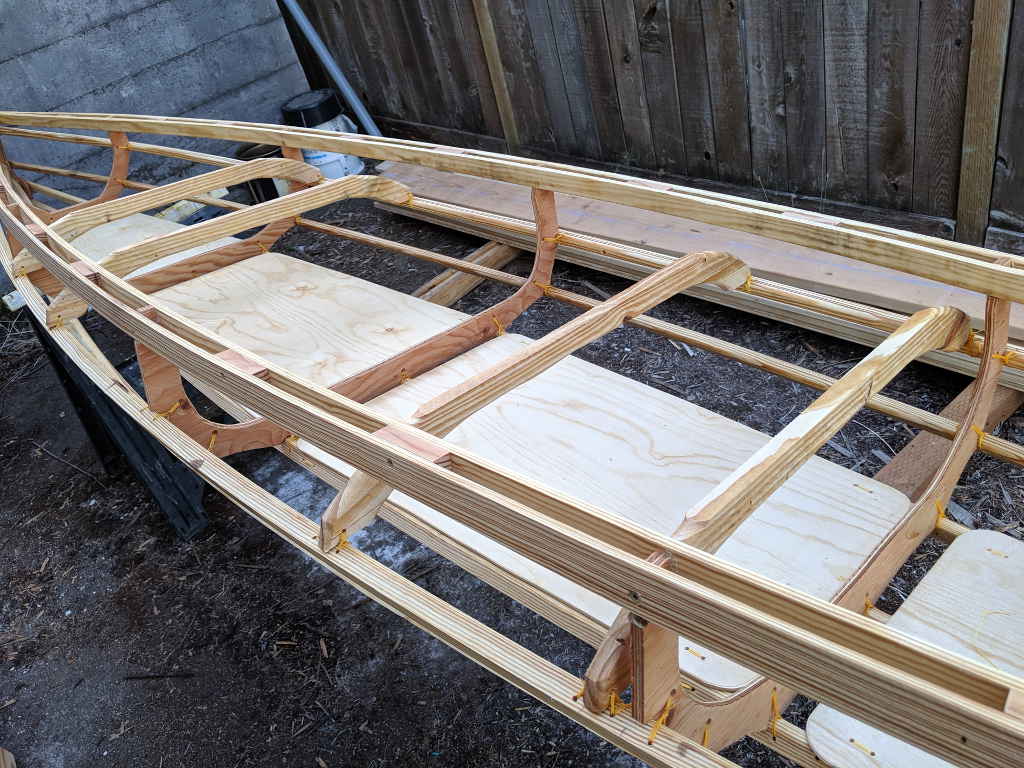
And even on canoes, there are fiddy bits.
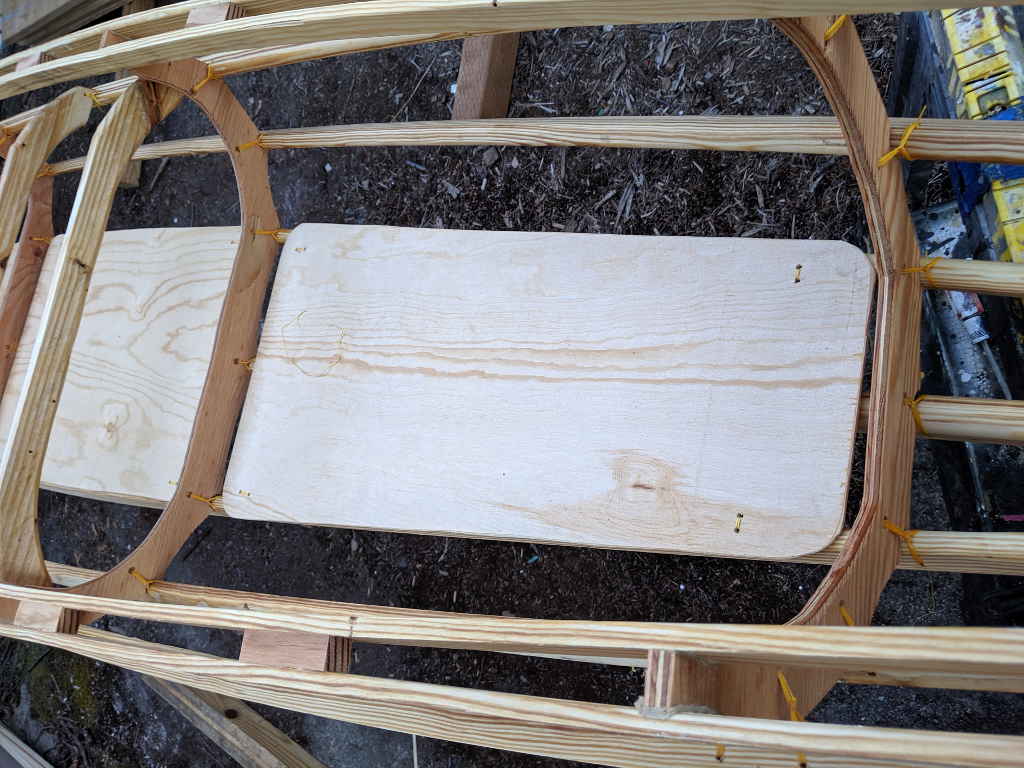
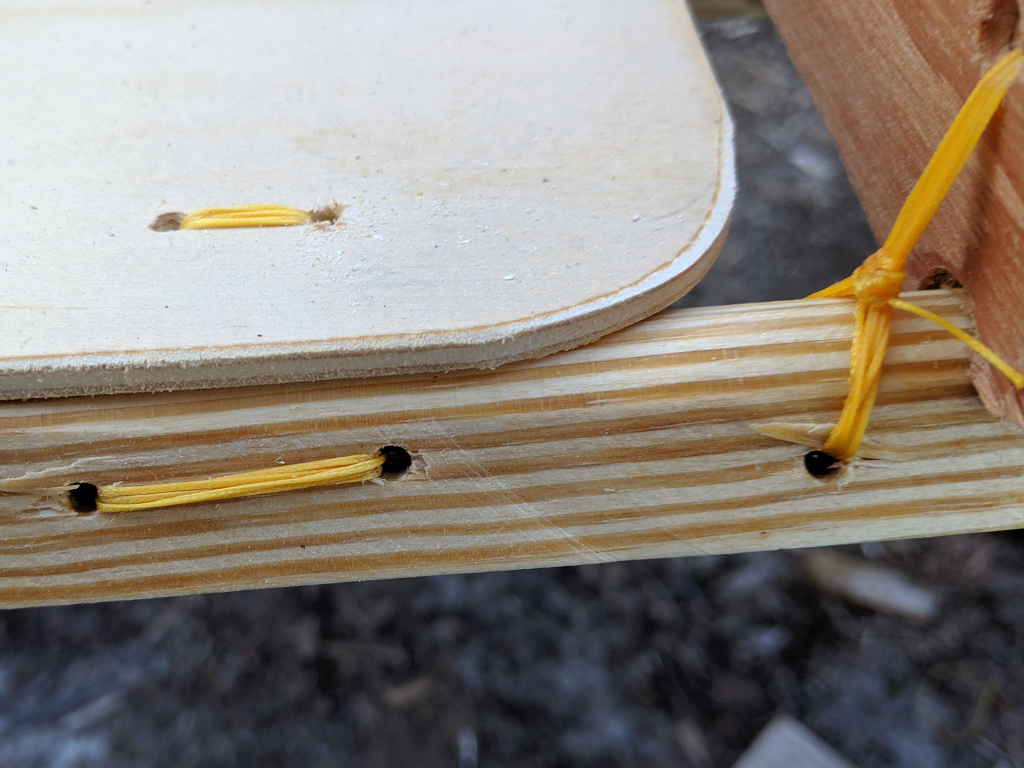
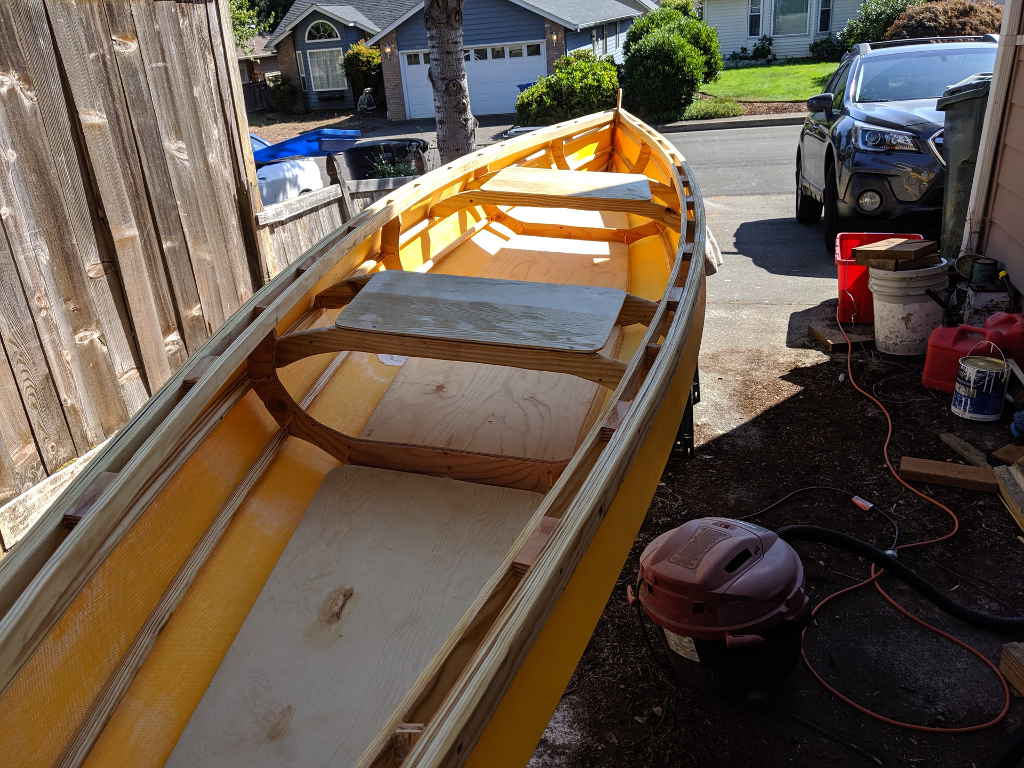
The floorboards are just 5.2mm Luan underlayment. I lash them to the stringers because I can't think of any other way to secure them, but I hope they never need to be replaced as I'd have to de-skin the boat.
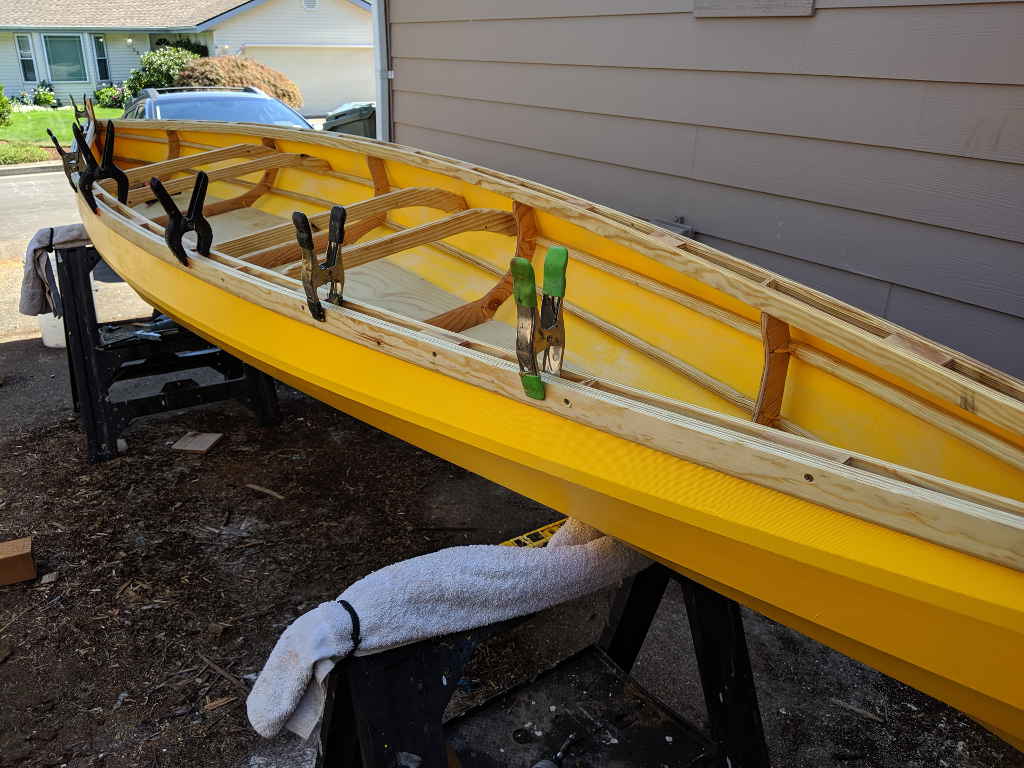
Seats go on last, but I had to lash the supports on. Seat placement is always a head scratcher. I might have gotten it right this time.
[In a first for me, I am adding some pictures to this essay. See below]
At the top of this essay, I said this was recycled pallet wood - nail holes and all. One thing I did was round over the inside edge of the stringers. I figured it'd save a little weight, look great, and make cutting the frames easier. Now, I'm not so sure.
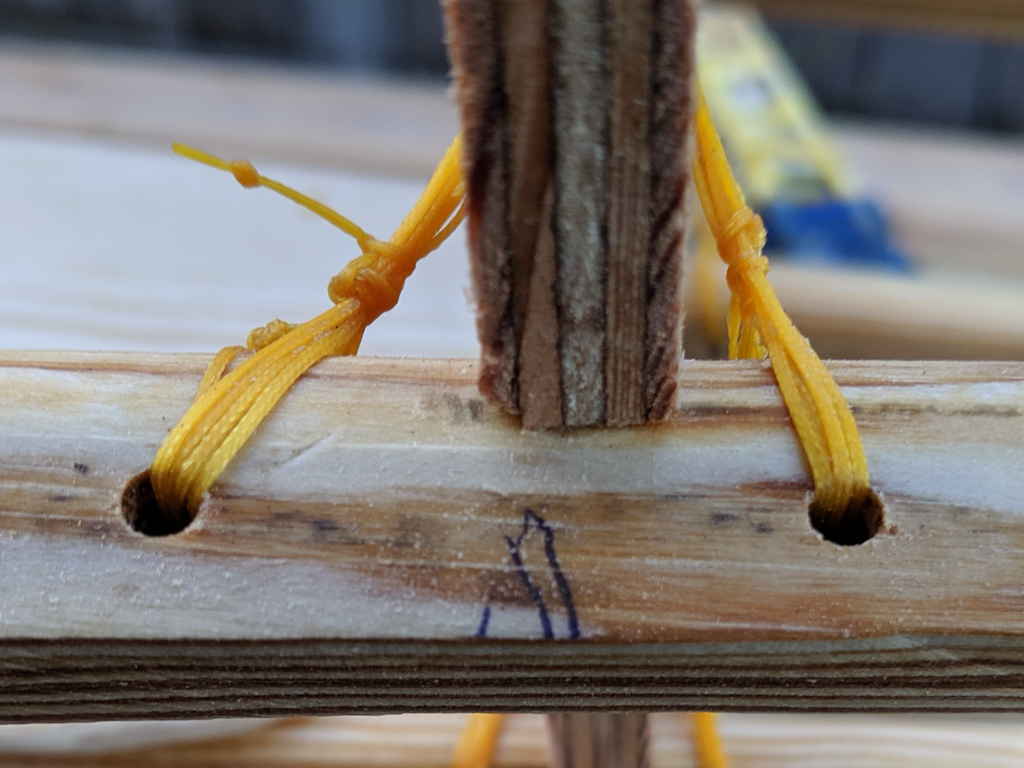
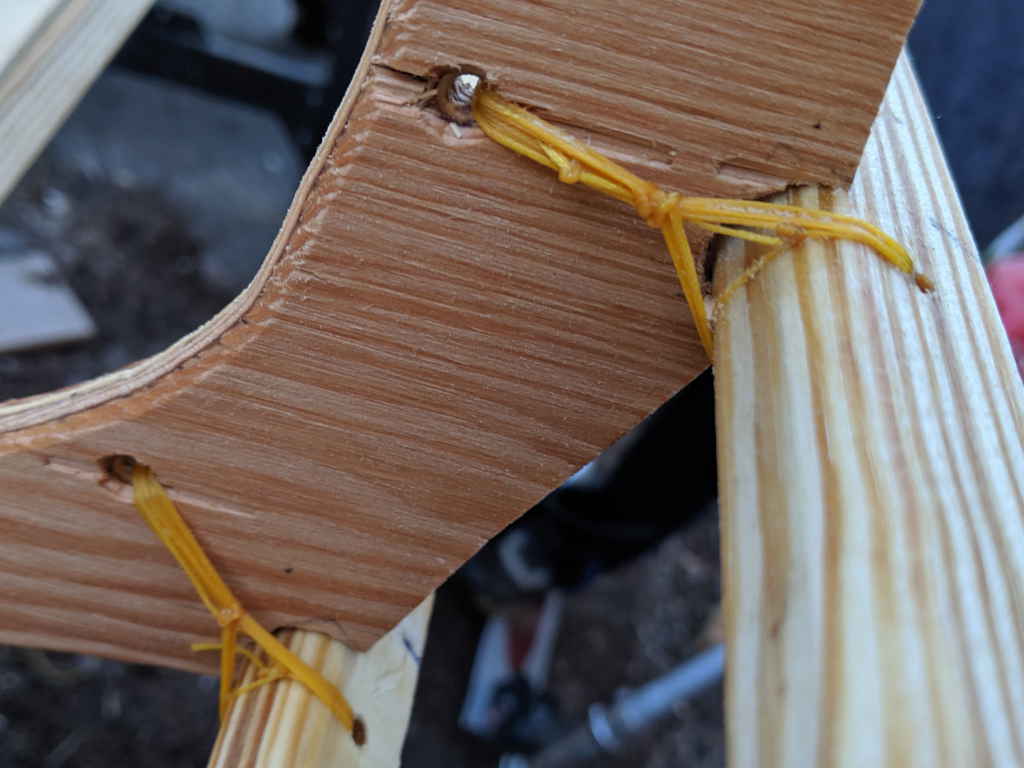
Another thing I did was instead of wrapping the sinew around the stringer, I drilled holes through them. The idea was to prevent the little bumps on the skin. That's a new kind of sinew, too. Cheapest stuff on Amazon, it was round, not flat. It binds very well - sometimes too well, like before the knot sets, as you can see with my little stopper for the Eskimo Knot sticking out there on the left.
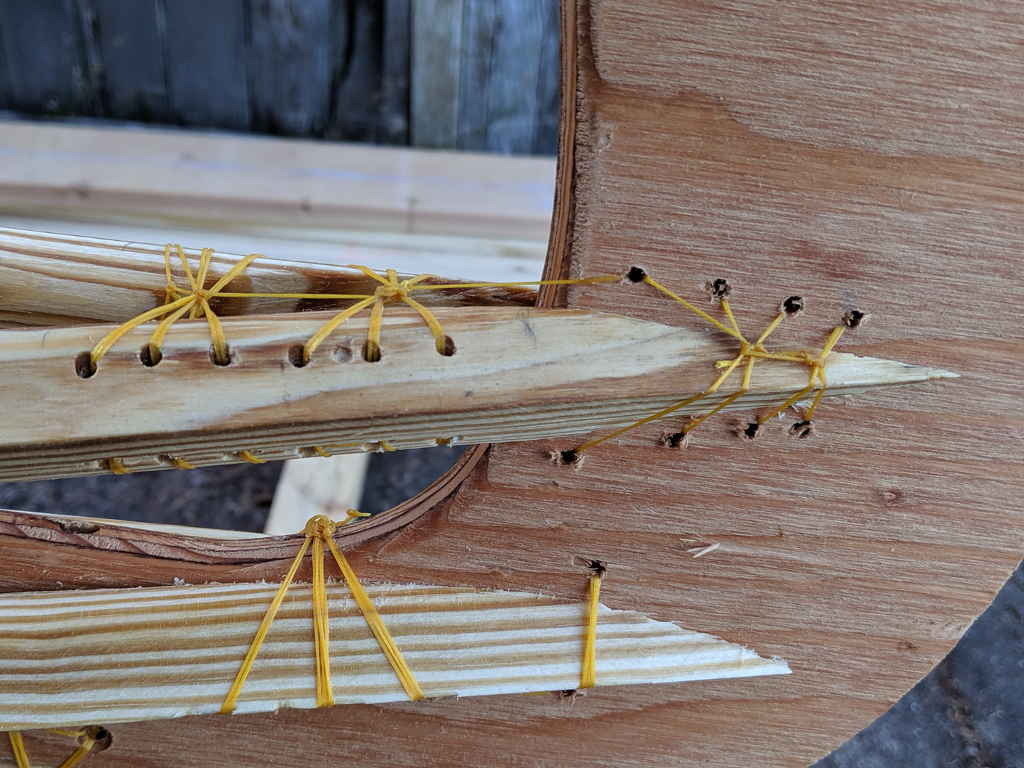
Stems are special. Some lapped, some went through holes. If I was a better builder, I'd be more consistent.
I tried to show how the stringer fit to the frames when the 3/4" stringers are rounded on the inside edge and the frame's notches are bored with a 3/4" spade bit. The stringers rotate instead of being forced into place. I won't se how bad this comes out until I skin it.
Here's how I did the floorboards. IF I scuff the threads enough to break them, I'll have to replace them, and I have no idea how I'll do that once the boat is skinned.
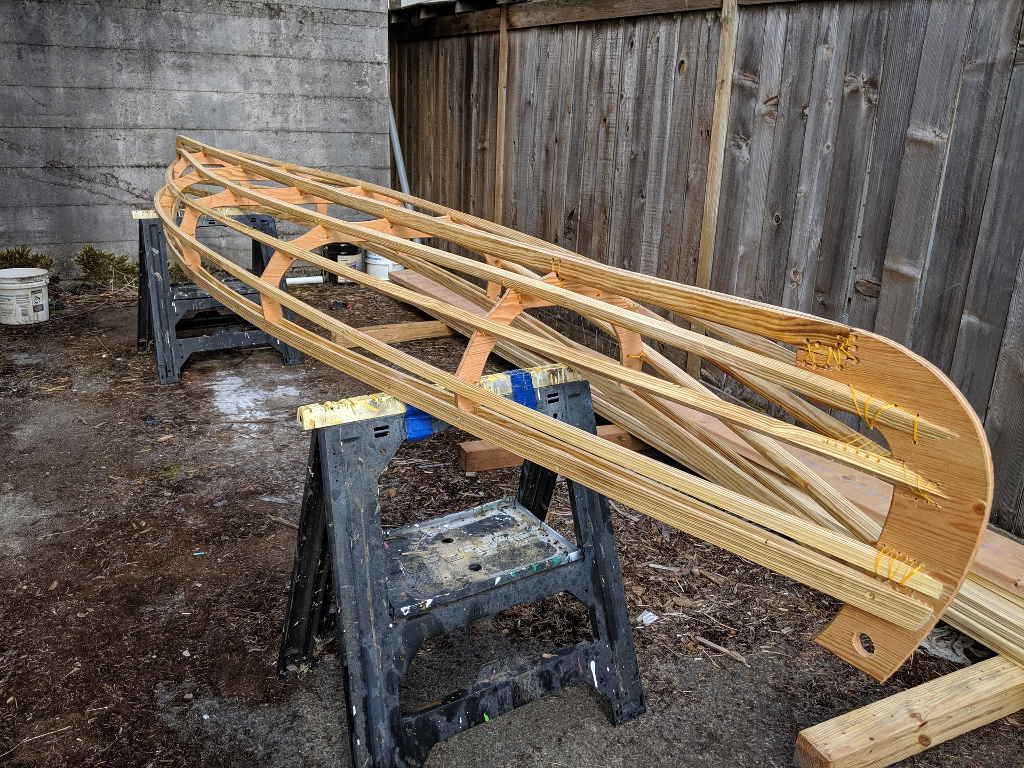
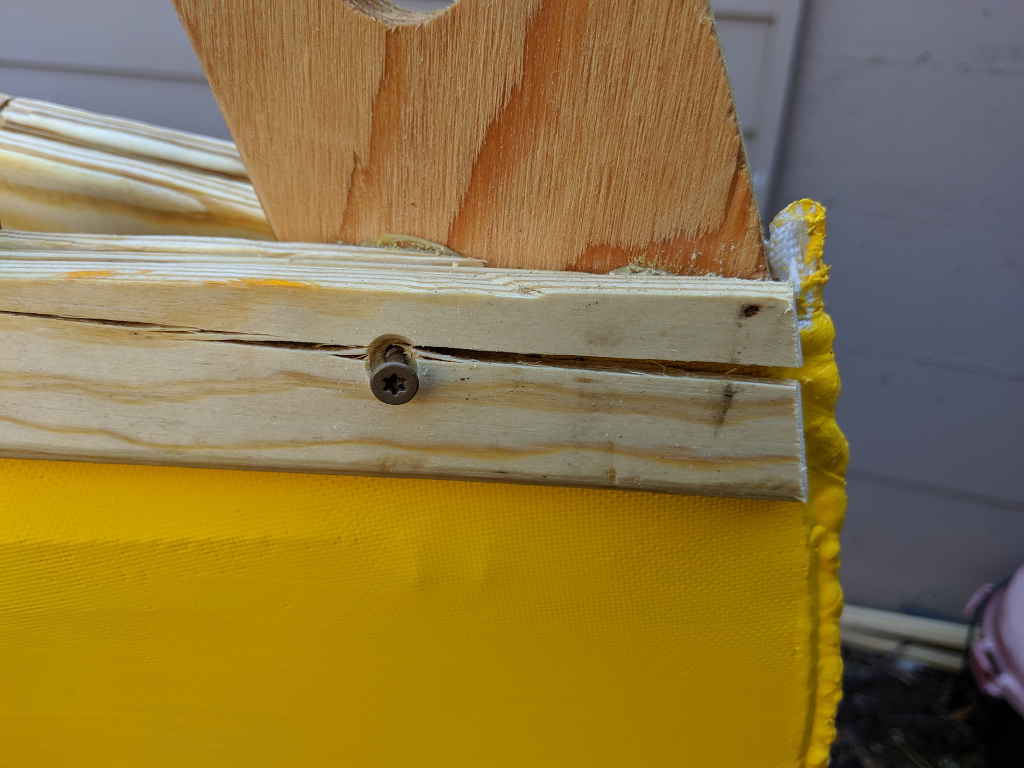
It wasn't all peaches and cream with the drilling. I had 3 sticks crack. See the discoloration there on the right? They all had that. Stoopid free wood. This one didn't break all the way through so I just filled the gap with PL Premium and clamped it.
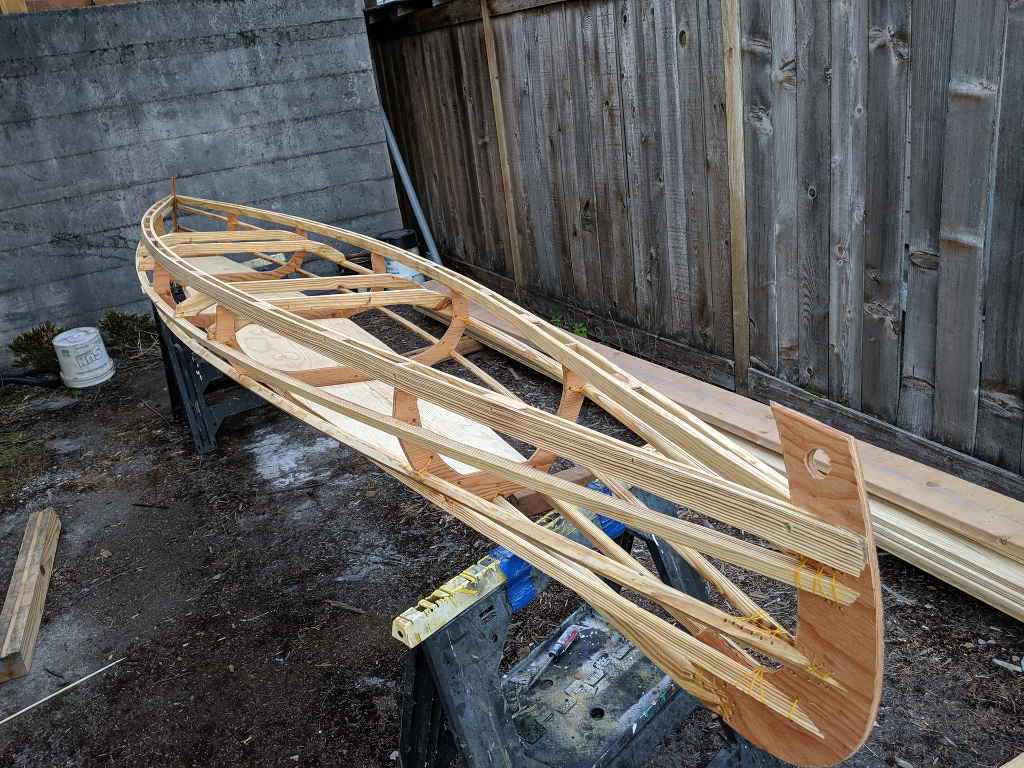
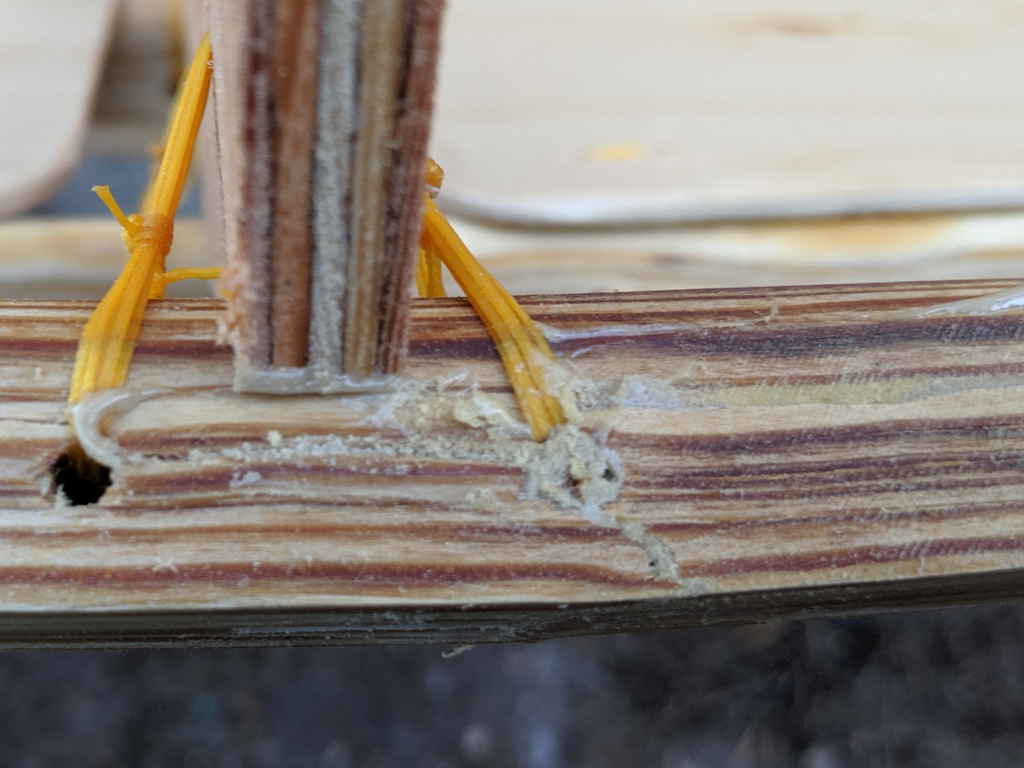
What I am trying to show is the keel. This was a "wood rich" project, meaning I had a LOT of nice wood to play with. I made the keel out of a 1" x 1.5" stick (actual dimensions) which is . . . a bit much. But it fit the stick I cut it from with minimal loss. I had to but a 1/2" round over bit ($34!)
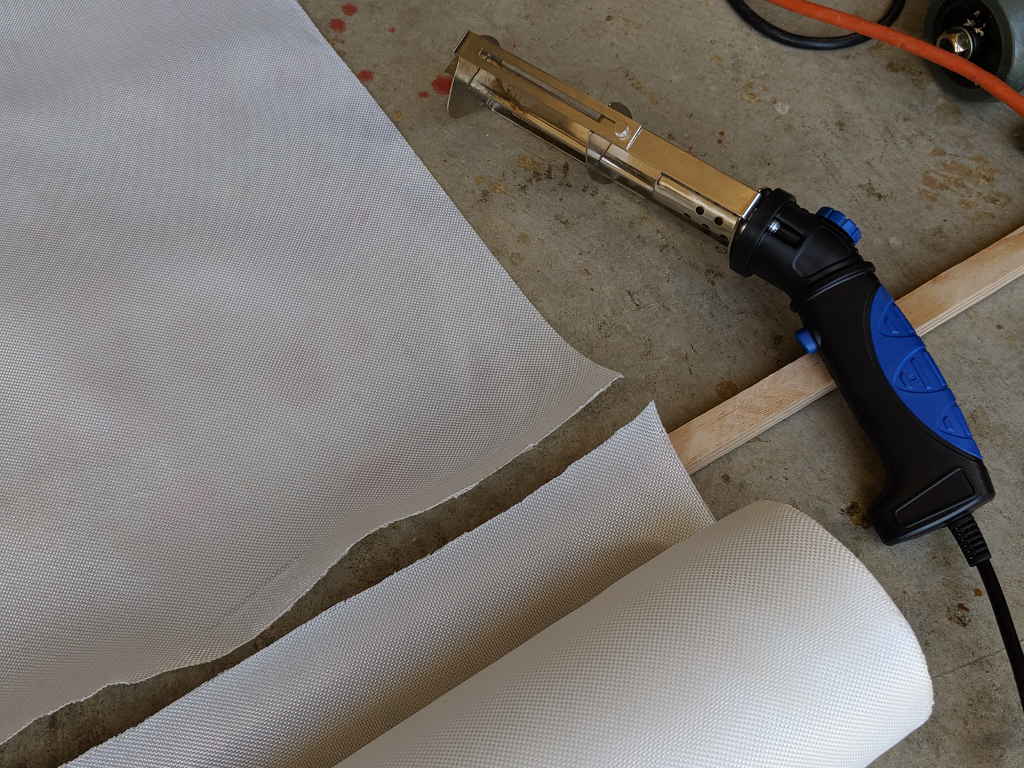
I'm sooooo close to skinning. I just need to pick up some staples. First step was to cut a suitable length. This is a $14 hot knife from Harbor Freight. If you are going to do a lot of this, get a better hot knife. People use everything from soldering irons to heated butter knives, but this is one of those cases where an expensive piece of equipment really pays for itself.
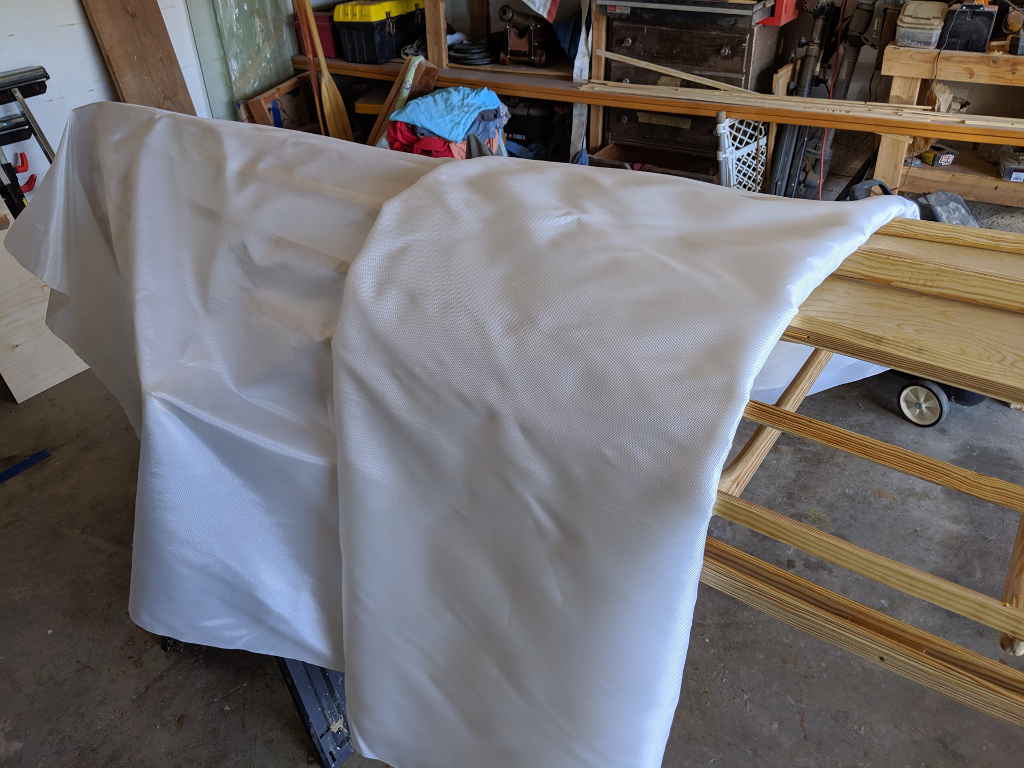
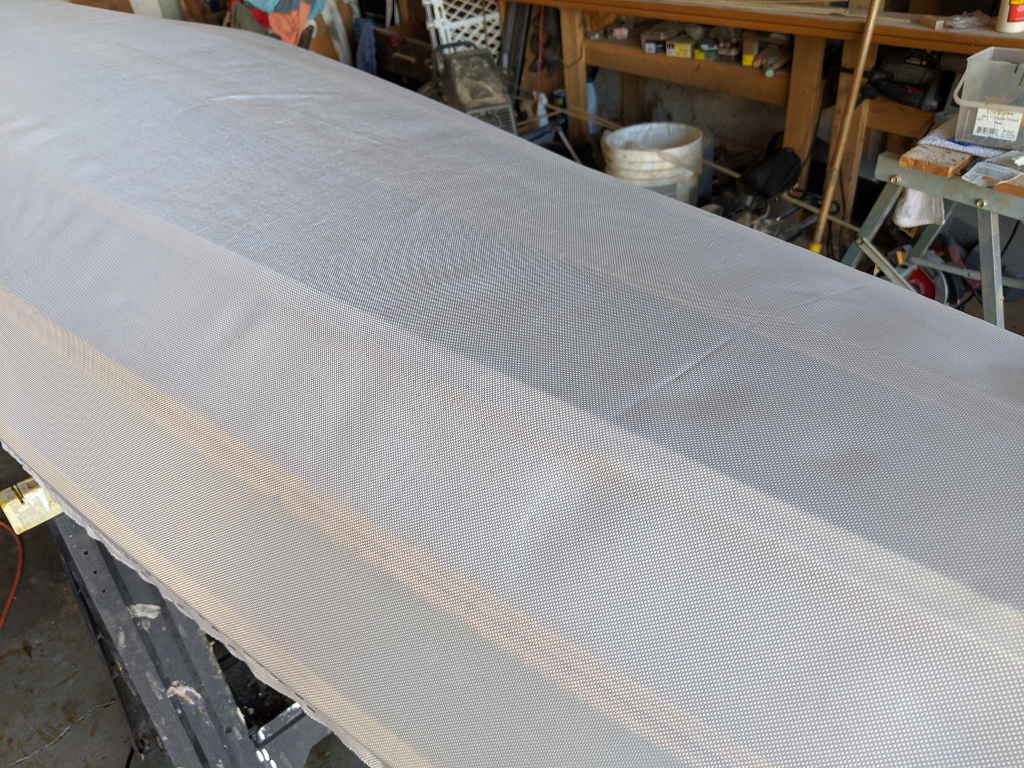
Lay the cloth on the boat. Be careful to prevent snagging. You'll see why.
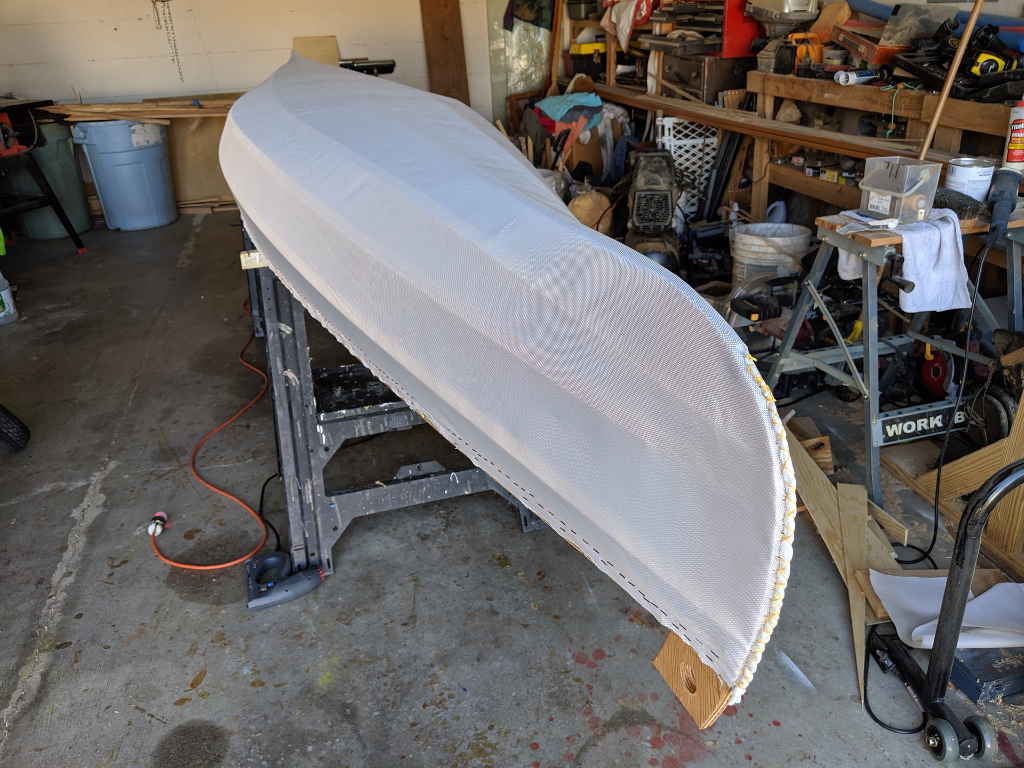
OK, so I skipped a few steps, like tugging tight, stapling, cutting, and stitching. But here it is.
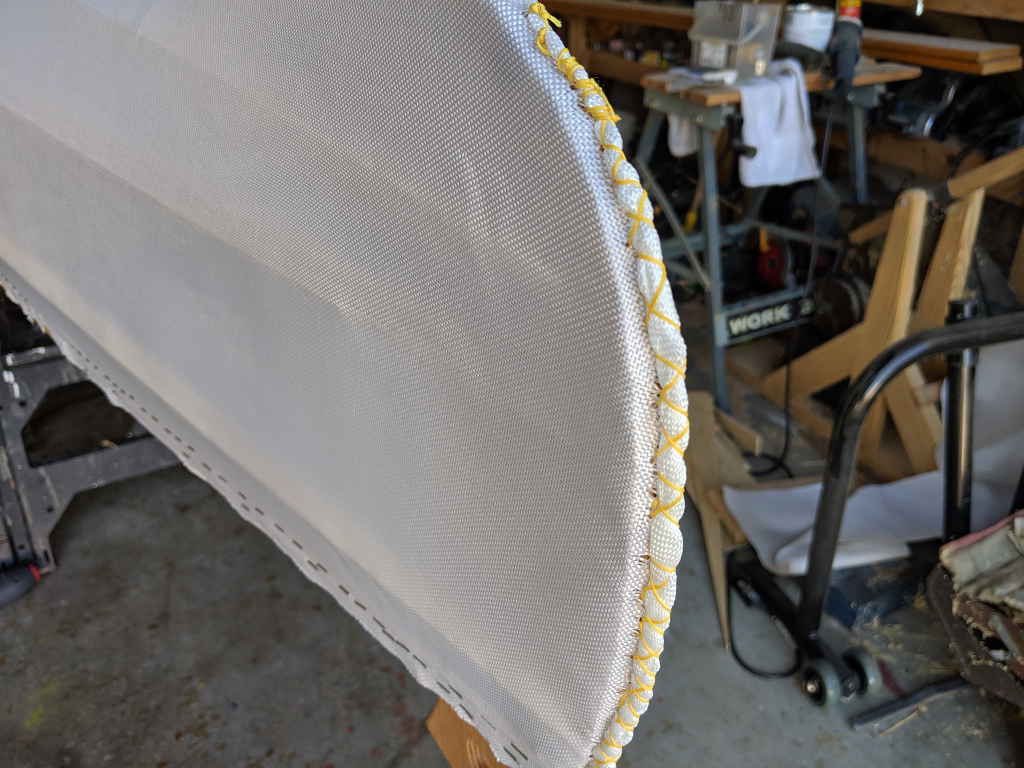
I've really got to work on my staple game. Again, this is an instance where good tools pay off. A nice electric stapler really helps. I used most of a thousand staples on this, like over 700. That's a lot of staples. And they are stainless steel because rust sucks. Look in your big box store, they have them.
I've got to up my stitch game, too. I mean, it's not terrible, but I can do better.
This shows the kind of wrinkles the initial fit produces. You really want to pull tight (without deforming) and minimize wrinkles as you staple. Always work from the middle out and pull tight.
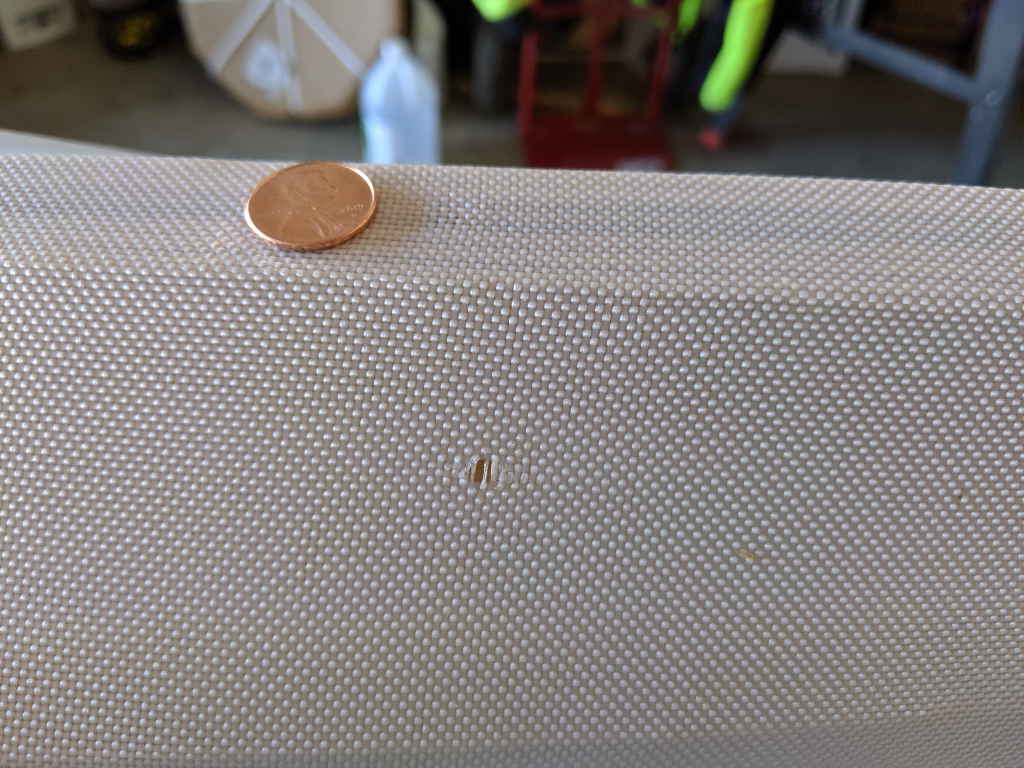
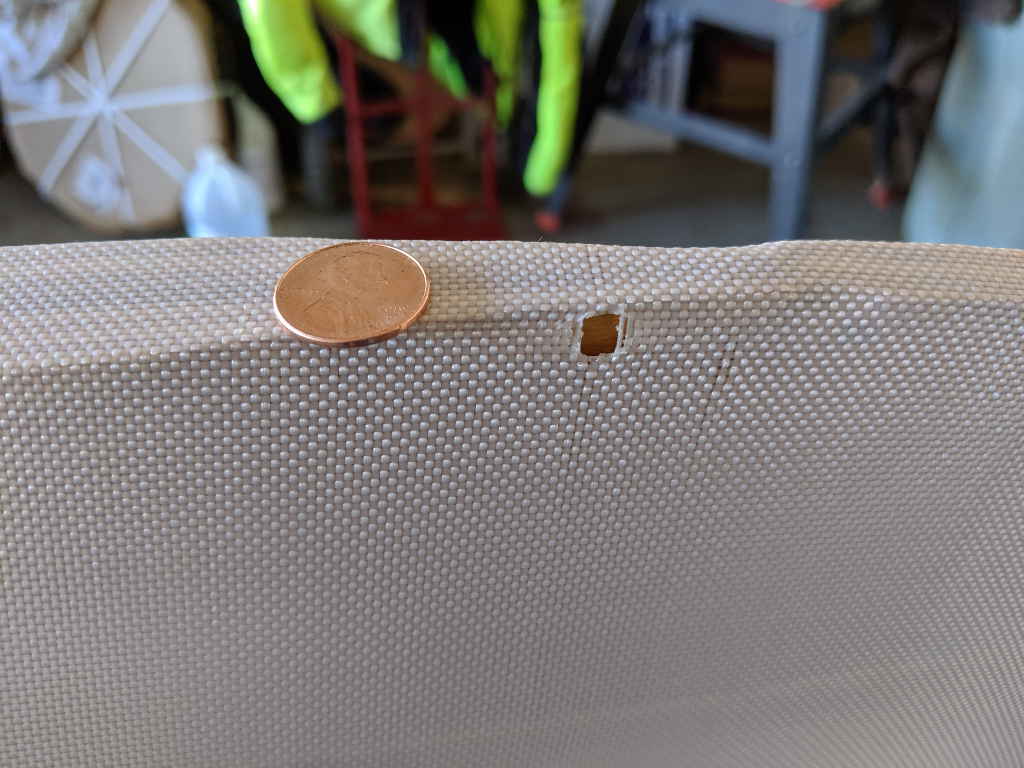
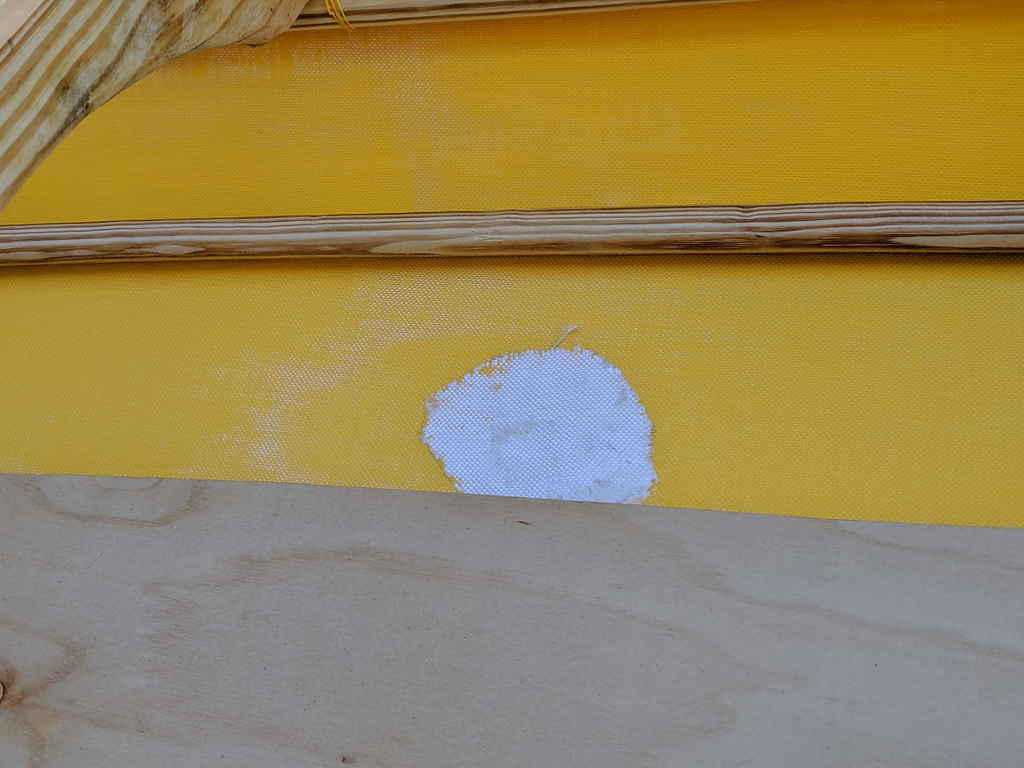
Here's a snag. This is after heat shrinking and the hole is too big to fill with paint.
Whoops, there's another. There was another that turned into a real problem because I thought I could fix it by applying more heat. What I ended up creating a quarter-sized 'hard spot' where too much heat had been applied.
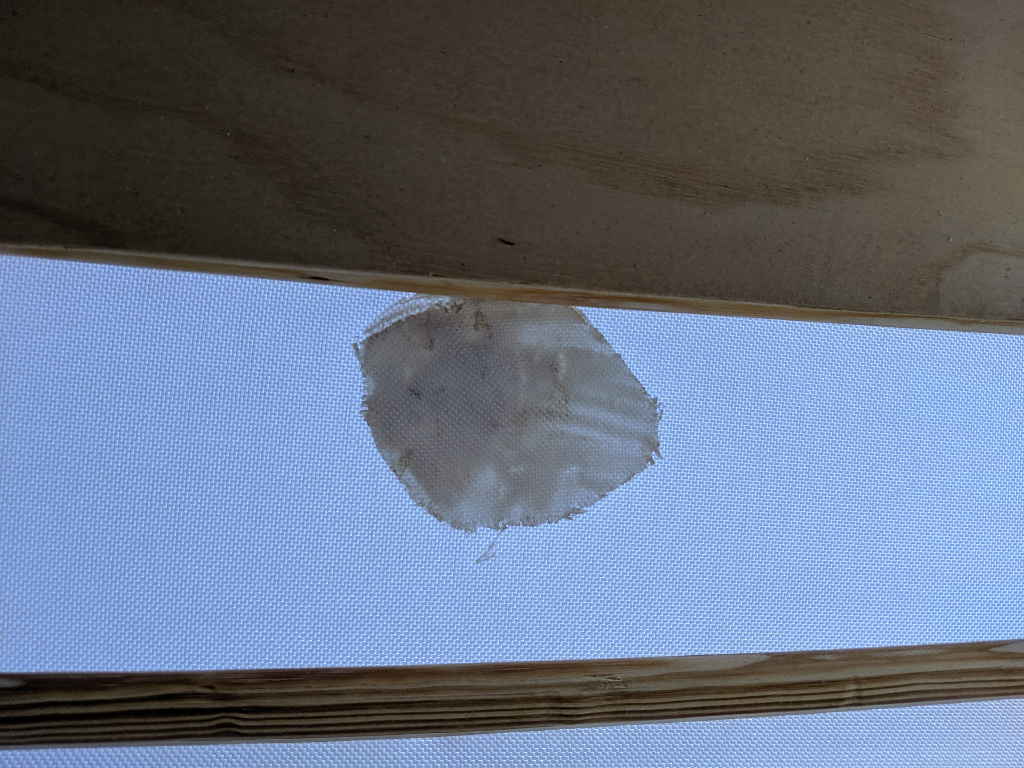
My solution was to cut a 3x-sized circle of cloth, smear it with adhesive caulk, and mash it over the damaged spot as hard as I could. The caulk was forced through the weave, I smoothed it out and called it good. I probably should have stitched it, but I was lazy.
This is what the patch looks like from the inside. It's not pretty. Everybody else just got smeared with caulk. Waterproofing isn't hard.
There she is, all painted and purty. Rustoleum Sunshime Yellow because the store was out of Safety Yellow. I like primary colors and I like safety colors because they are usually available no matter where you go.
The paint doesn't really soak through the cloth, so my patch is even uglier now (viewed from the inside.)
Now it's time to cover the staples. Rubrails away!
Southern Yellow Pine seems to split easily. Nothing clamps and glue can't fix.
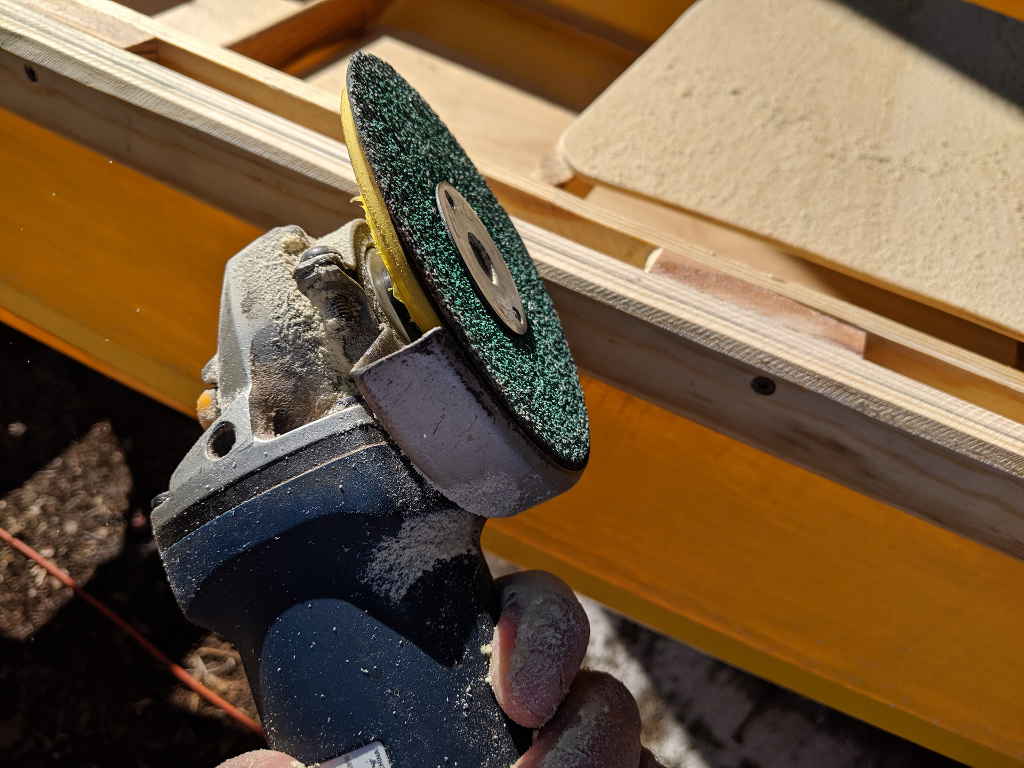
A little cleanup with a 4.5" angle grinder and a 24 grit sanding wheel. I followed this with an orbital sander to smooth out the tool marks.
And finally, the seats. "Dang, those seem kinda high, don't they?" I can hear you ask. Yes, they are about as high as I dared make them. The height is for comfort, not safety. I figure if they can teach a chimp to ride a unicycle, I can learn to paddle an unstable boat. You'll also notice the seats are placed symmetrical, fore and aft. This is a fairly narrow boat so weight needs to be concentrated at the point of maximum displacement. The good news is there is no longer a front or back to this boat, just toss it in the water and go.
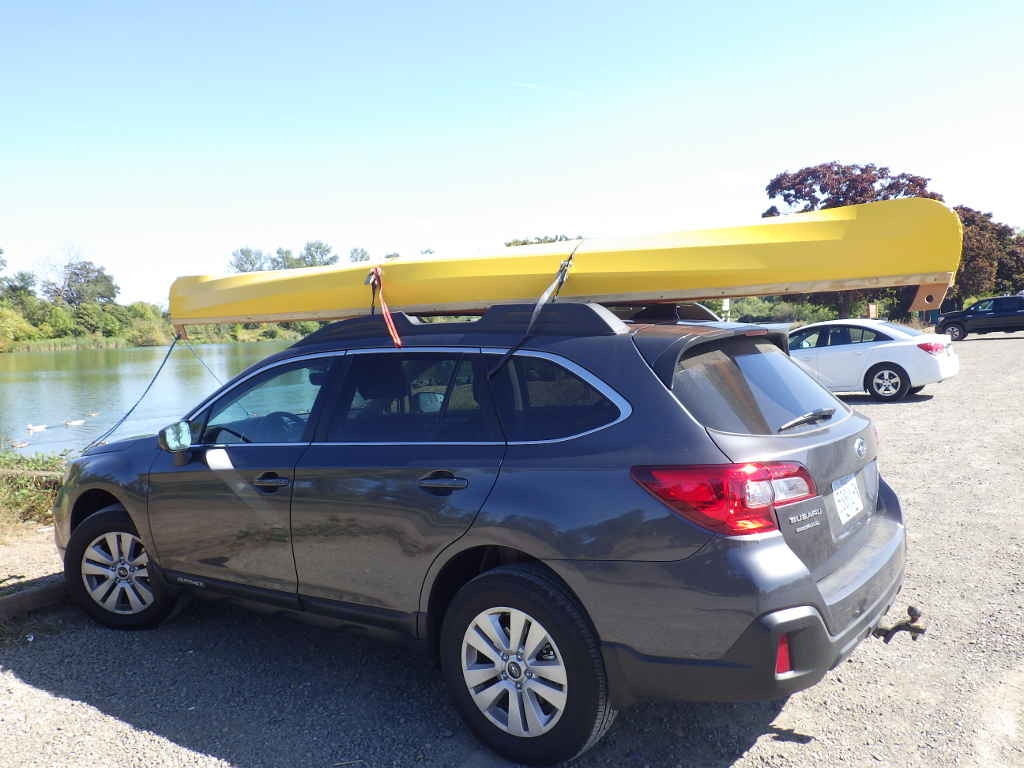
Loaded up. I forgot to get a weight on it. It's overbuilt so it is heavier than it needs to be, As a side note, I am deeply saddened by how the Subaru engineers set up their roof rack. This is a miserable cargo hauler.
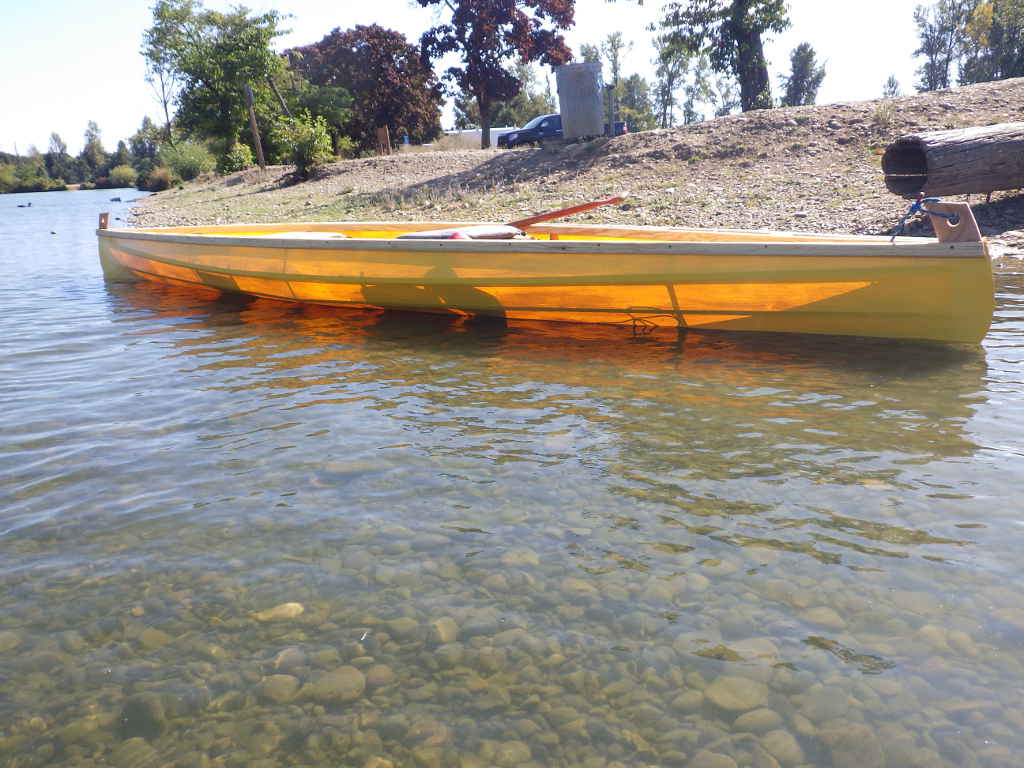
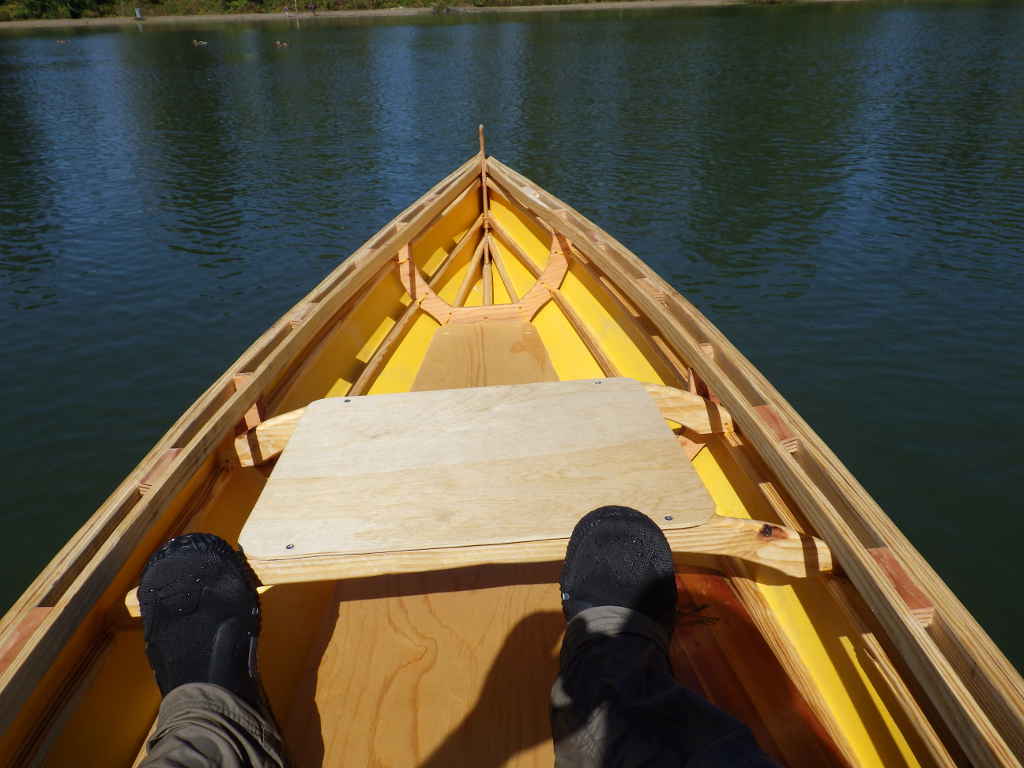
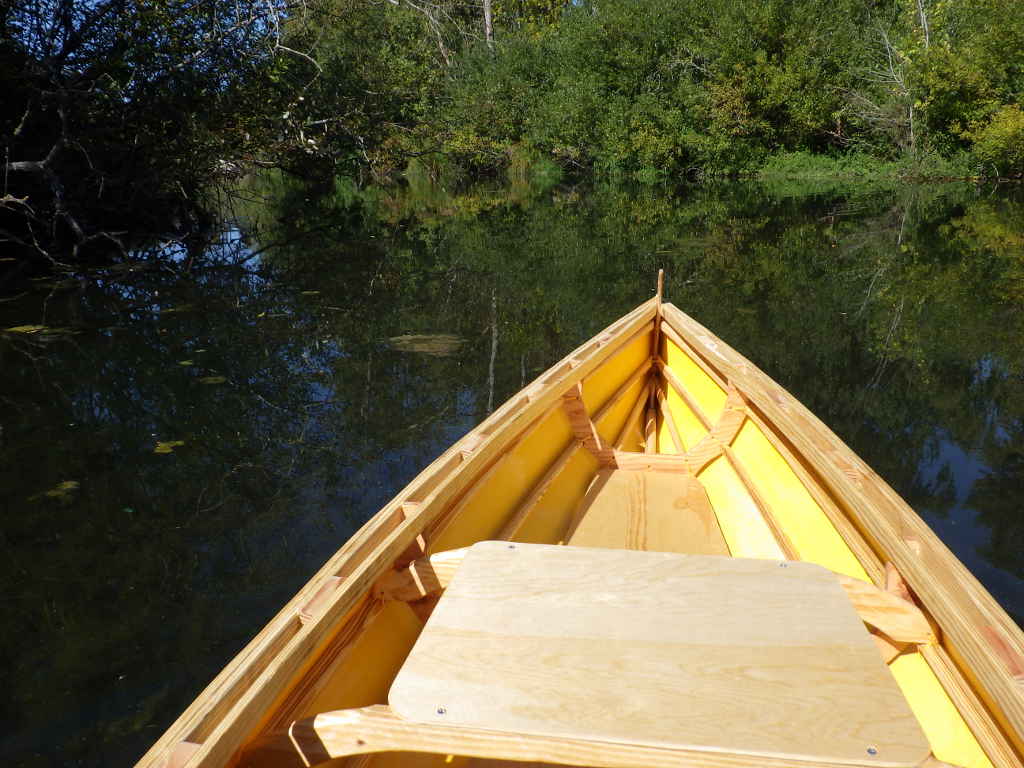
She floats nice.
OK, cockpit is a little cramped. I probably should have straddled that frame rather than have the seat all the way inside the frame. Actually, it wasn't too bad, really and since this is my boat and I fully expect to do most of my paddling solo, I'm keeping it this way. Remember I said I made the seats high on purpose so they'd be comfortable? And how I guessed it'd make the boat a little tender? I was right on both counts.
I like to do my sea trials on a scuzzy little scum pond behind a Walmart. Sure it's a scuzzy little scum pond behind a Walmart, but it is water and it is kinda pretty. It worked pretty well. Maybe a seat adjustment, maybe, maybe. I think the biggest problem was that I forgot to put in the rocker like in the plans. She's dead flat, stem to stern, which makes her a tad slow to turn. Still, nice boat. |